 |
| Before & After |
Here's my "photo essay" of my journey to a reupholstered guest room chair.... and the best part, it only cost me $20 to do it. ($4 for the fabric, $8 for foam, $2 for headliner material and $6 for the furniture stripper to remove the old finish from the arms/legs)- now to make a window treatment out of the left over material I got.... but that's a whole other post!
Here's the chair as it was (it has been on my "list of things to toss or fix" for a while now) I "inherited" it when I married my husband, oh nearly 10 years ago, who had inherited it from his parents when he moved out into his "bachelor pad"):
 |
| Notice the top piece has batting showing through, thanks to a cat... |
 |
| The finish looked like it needed a redo, and the seat was sagging |
While the sagging seat and ripped top were features that made this chair so "endearing" (especially to my husband), I was ready to do something about it. After watching two DIY reupholstery videos on Youtube, I figured I was good to go! :) One thing that helped me (and was suggested in one of the videos) was taking A LOT of pictures as I took the chair apart.
 |
| Removing the legs/arms |
 |
| The bottom of the seat |
I wanted to save the webbing that was under the seat, so I wouldn't have to buy more... so armed with a screwdriver and needle-nose pliers, I got to work!
 |
| Removing the staples, so that I didn't rip the webbing was tough! |
 |
| But I was able to get it... |
 |
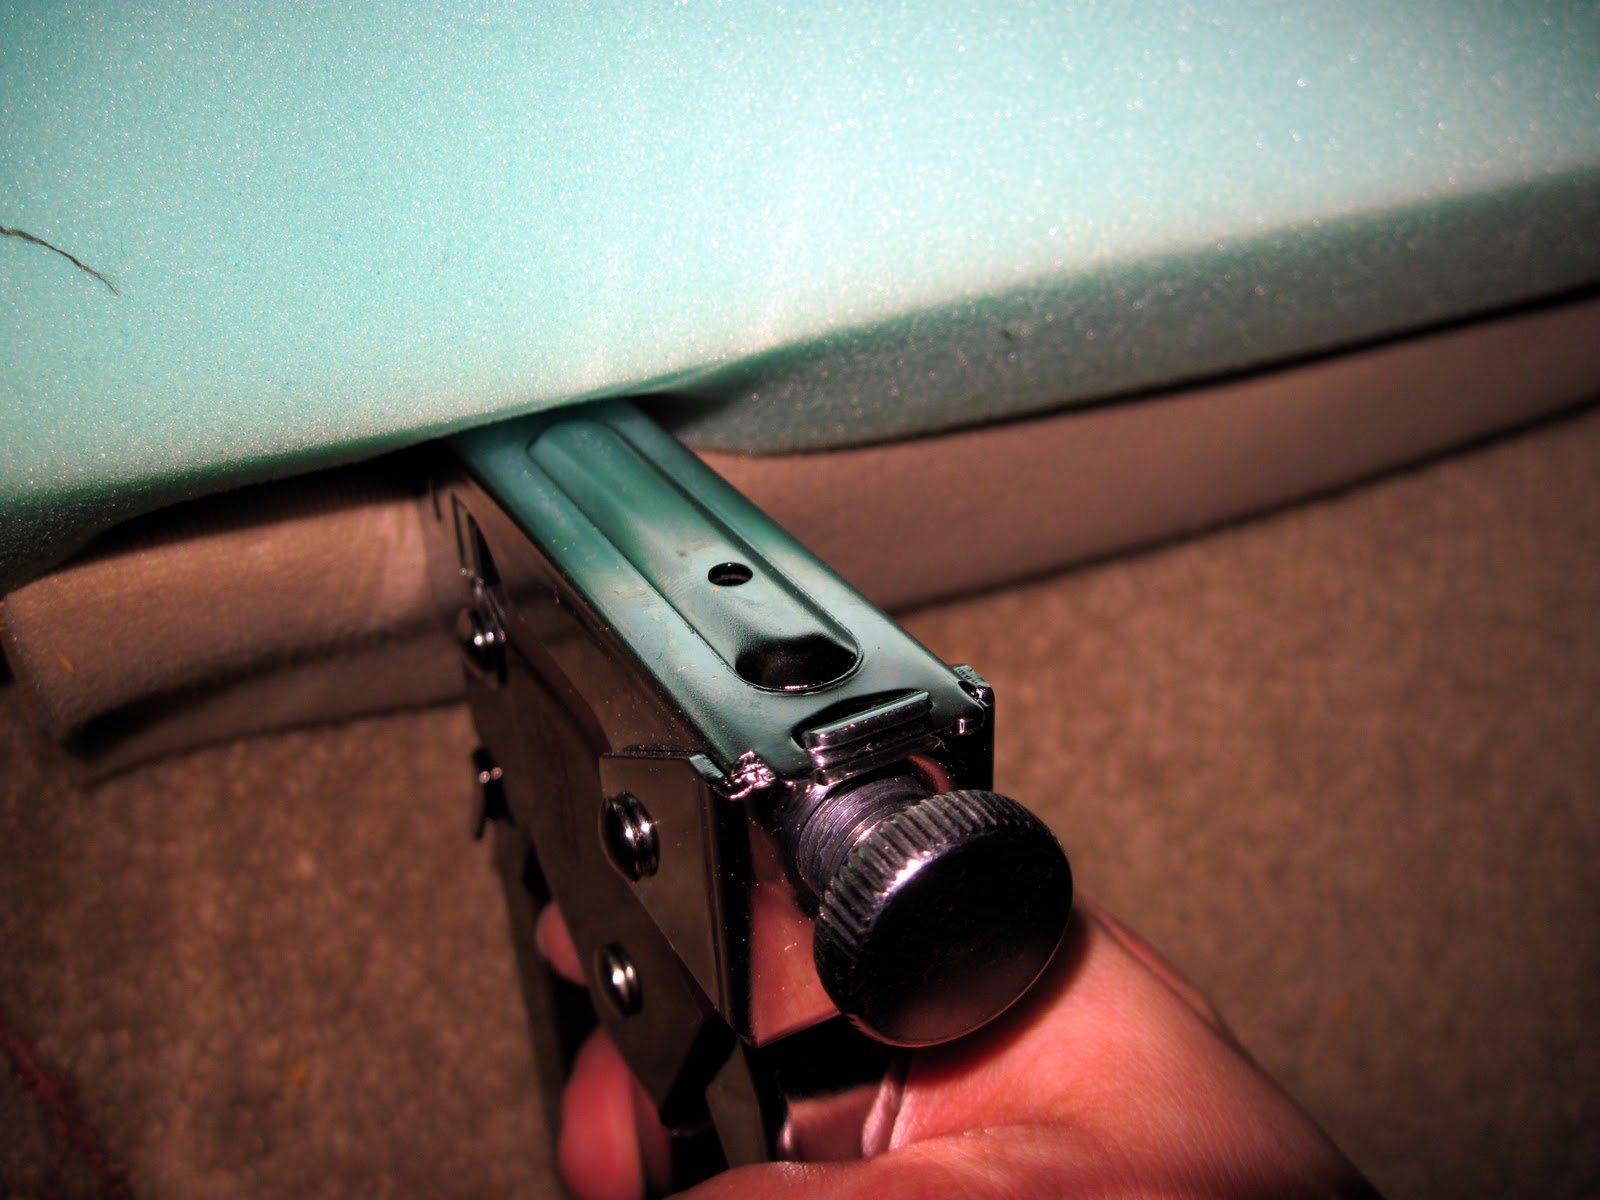
| Look at all of those staples that were hidden by the webbing... oh no! |
I had my work cut out for me! I watched/listened to Les Miserables on PBS while I took off the upholstery. (Do you hear the people sing? I did for hours on end after watching it, instant replay in my head is GREAT!) I think I need to invest in a tool that removes the staples, because it was tough to get some of those staples out!
 |
| Most of the seat is finished... see what I meant by "sagging" seat! |
 |
| The top portion, with the upholstery removed |
I tried to be very careful in removing the upholstery since I needed it to be my pattern!
 |
| After I ripped out the seams, I have a pattern |
I laid the old upholstery on top of the material and added a couple of inches to the width and length, but cut the "corners" exactly.
 |
| Pinned the "pattern" to the new fabric |
 |
| Pinned the corners together (right sides together) |
 |
| The back rest upholstery, I had to rip the seams... (I couldn't believe how dirty this chair was, yuck!!) |
After ripping the seams, I used the pieces as my pattern:

Pinned it all together, and sewed--


 |
| the completed top piece, attached by stapling the fabric to the bottom of the back rest |
Now, on to the seat:
After removing the old foam-- I added new "foam" (headliner) to the front of the seat:

Then stapled the new foam onto the frame, I had no idea that foam was so expensive, I was glad I got it for 50% off!!
 |
| The foam stapled onto the frame |
Back to the sewing machine, time to sew up the "corners" on the seat fabric:
Then I stapled the fabric back onto the frame, and completed it with the webbing (yes, I did manage to save it)!
 |
| The finished bottom of the seat |
Now on to the legs/arms:
My arms are still telling me about this part of the project! :) At first I thought I could just sand the old finish away... ha ha ha ha, not so. After a quick trip to the hardware store, I bought some furniture stripper (and boy is it MEAN stuff!!), and came home and took the old finish off. **Note: This stuff ate through my rubber kitchen gloves, I guess you can buy special gloves for this, but I didn't so I went through 2 pairs of kitchen gloves in this process!!**
 |
| The arms/legs after they had been stripped |
Next it was on to sanding-- twice, once with 150 grit, and then once again with 240 grit (per the directions on my stain).
After staining the arms/legs (2 coats), I let them sit overnight before reassembling.
 |
| Finished arm/leg |
Now to put it all back together:
 |
| Thanks to my husband, it got put back together in record time! |
The finished product:


 |
| In it's home in the guest room! |
It sure matches the bedding better than the old version! :) Next up on my "to do list"-- the window treatment for the room with the extra material!
Thanks for reading along!
This mess was brought to you by,
Valerie
This post is partying here!
Wow! It was definitely no good before- I'm surprized by how much better it really does look with just some new fabric! Great job! :)
ReplyDeleteIt looks much better! Just goes to show that with a little bit of work, a ready to throw out piece of furniture can become something lovely in your home again! :)
ReplyDeleteTnx for linking up at my party this weekend!
great job! we are doing some chairs soon, so thanks for the inspiration.
ReplyDeletehiya i'm maggie and i am visiting from make the world cuter and i am following you too x great tutorial and it turned out great x tfs x hope to see you at mine sometime
ReplyDeletexmaggiex
I am very impressed. What a great way to recycle and to save money. It came out beautifully!
ReplyDeleteGreat job! Thanks so much for sharing this last weekend at Inspiration Friday! :-)
ReplyDeleteVanessa
Your chair looks amazing and the time and muscle power were well spent...thanks for linking to my party - great project to show!
ReplyDeleteOooh I'm so glad you posted this! I've got two reupholstering projects in the queue - an upholstered rocking chair, and a *gulp* wing-back chair.
ReplyDelete